Finish the Honey-Do List
 Give her the gift she REALLY wants… Finishing the “Honey-Do” List. Dry Clean Carpets, Remove Crayon from Walls, Replace Floor Registers… OH MY! Don’t Fret, all the information you need to successfully conquer that list in a timely manner is provided below…
1) Re-Caulk Tub
Removing old mildew infested caulking and replacing with bright new caulking is as easy as 1, 2, 3…..
1) Remove Old Caulk
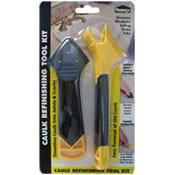
Place 3M Caulk Softener on existing tub caulk and let stand for 2 hours. This wonder bottle can cover 24 linear feet at an 1/8″ bead, so one bottle should do the trick for your tub surround. Once the caulk softener has been sitting for at least 2 hours, remove old caulk with a putty knife or the caulk removal tool that came in the Caulk Refinishing Kit (shown below). After removing the existing caulking, make sure to clean the area with rubbing alcohol and NOT water, to ensure that you’ve removed all traces of mildew. Let the area dry. Next, fill the bathtub with water before applying new caulk to ensure the strongest seal around the tub. Optional (and recommended): use Seal Rite Tape to keep application straight and neat.
 |
 |
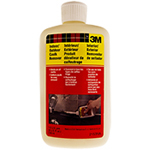
3M Caulk Softener –
|
Caulk Refinishing Kit
|
 |
|
Caulk straight lines with Seal Rite Masking System! |
|
2) Apply New Caulk
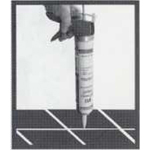
First, make sure the area is completely dry to achieve better seal. It is best to apply caulking in temperatures above 40 degrees Fahrenheit. Load caulk tube into a caulk gun and cut tip to 45-degree angle or use the Caulk Tip Set that can be purchased separately: Start first on one of the shorter walls (usually the sides of the tub). When squeezing the trigger, keep moving and always pull the gun in opposite way the gun is pointing (see photo below). Keep constant pressure on trigger and don’t lift gun until you reach the corner.

Photo courtesy of Popular Mechanics Online
Clean tip of caulking tube with paper towel between walls. Ease up on the trigger as you reach the end point (corner). When you are finished with all sides, run the caulk finisher (included in the Caulk Refinishing Kit to smooth down and remove any access caulk. **Make sure to smooth down caulking and clean up any excess caulking within 20 min of applying**
3) Let it Dry
Let caulk to dry/set according to the label of whatever caulking you are using, or if you are using the Colorfast Brand Caulking from our site, let stand for 24-48 hours before using the tub/shower. Remove Seal Rite Tape (if applicable).
Need to find a colored caulk that matches your grout or bathroom decor? Check out our website dedicated JUST to caulking!! Click the photo below or visit THIS link. 
2)Replace Floor Registers:
Replacing old dingy existing floor registers is a BREEZE with Installerstore! We have a wide selection of styles, finishes, and sizes (even hard to find 3×10!). Choose from Plastic, Classic Metal, Decorative Metal and Wood Floor Registers. With a full selection of finishes and designs, you’ll be sure to find a register to match your decor! Click any of the images below to go directly to the category on our webpage.
Classic Metal Floor Registers |
Decorative Metal Floor Registers |
 |
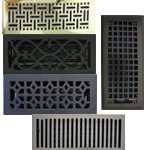 |
Plastic Floor Registers |
Wood Floor Registers |
 |
 |
Don’t forget to measure the opening/hole in the floor in inches and NOT the existing faceplate. For more information on the proper way to measure and differences in floor registers and grilles, read an earlier blog published: “How to Measure Floor Registers and Grilles.”
UPDATE: We have also launched a separate site dedicated just to floor, wall and baseboard registers and grilles! Visit our new site www.floorregisters-n-vents.com

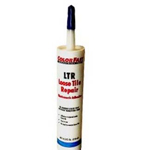
3)Fix Loose Tiles
Finally fix those annoying tiles that move when you walk across them. Colorfast Brand Loose Tile Repair is formulated to re-adhere loose ceramic tiles by injecting elastomeric adhesive under the hollow tile. It should ONLY be used on concrete or exterior grade plywood substrates. This problem solver product can only be used in interior applications and not for use in showers. The instructions are simple, and repairing those loose tiles only requires a tube of the Loose Tile Repair, caulking gun, rubber mallet, and drill with 1/8″ masonry Drill Bit.
- Shake Loose Tile Repair well before using. Tap Tiles lightly with a rubber mallet to determine that the tile has hollow areas.
- Drill into the grout joint around the loose tile with a 1/8″ masonry drill bit. Drill down slightly deeper than the thickness of the tile. Drill 4 to 8 holes around the loose tile. Make sure NOT to drill into the tile.

- Use a vacuum or shop vac to clean away all dust and debris from holes and surrounding area.
- Insert Loose Tile Repair tube into a standard caulk gun. Cut the tip to allow a steady flow of adhesive. Make sure not to cut too much. Insert the tip directly into a drilled hole and inject adhesive with light pressure. Tap the tile with the rubber mallet. Rotate the caulk gun to the other holes and inject until adhesive begins to come through the holes.
- Clean up excess with damp sponge or rag. Place a weight (bucket of water works great) on the tile and allow 24-72 hours for adhesive to cure. Fill holes in grout with matching caulking or grout.
| Loose Tile Repair by Colorfast Industries |
 |
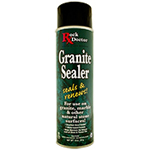
4) Seal & Clean Granite Countertops
There are products available that make cleaning and sealing granite countertops simple! Installerstore even has products you can use daily to clean. If you think just cleaning the granite countertops religiously will keep them from ever looking bad, think again. All granite tabletops, countertops and vanities should be treated with a protective sealer before any cleaners are used. Natural stone surfaces should be sealed every 12 to 18 months.
Apex Rock Doctor Granite Sealer |
Apex Rock Doctor Granite Cleaner |
 |
 |
|
|
$2 manufacturer rebate for Apex Rock Doctor granite cleaner and sealer. BUY NOW!
5)Re-Finish Hardwood Floors
Re-finishing hardwood floors yourself tends to be an overwhelming thought to most, but it does not have to be an overwhelming experience! Installerstore has all of the products to make hardwood floor re-finishing easy!
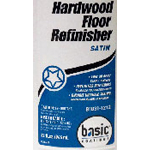
First thing is first, these first products I will be talking about are for re-finishing, meaning you have floors that have previously been finished. Over the years, you may find that your finished floors look dull and have small scratches. Basic Hardwood Floor Refinisher can revitalize your finished hardwood floors and can even fill in small scratches. The directions are easily for both products, simply clean your floor, apply the Basic Refinisher using a synthetic lambs wool applicator pad and let dry. It really is that simple!
Basic Hardwood Floor Refinisher |
|
 |
|
For Use On: All types of un-waxed, residential, and commercial polyurethane finished wood floors that are dull, worn, scratched, or show signs of wear.
|
|
If you have laminate floors, don’t fret! We have products for your situation as well!
Laminator Plus
|
|
 |
|
Lamanator Plus laminate care products. 3 steps to bring back the shine and protect your laminate floors! Step 1– Deep Scrub to remove dirt build-up. Step 2– Restoration to bring back shine Step 3– Buff Dry Cleaner to keep your floors looking their daily best. |
View our full line of floor cleaner and care products.
6) Install Zoroufy Stair Rods
You’ve purchased beautiful Zoroufy stair rods, and now it is time to install them. Below are installation tips for all Zoroufy Stair Rod Collections and detailed instructions for each collection.
Are you in the market to purchase stair rods? Read our earlier blog to help you find the collection that fits you: “What is a Stair Rod?”
Installation tips for all Zoroufy Stair Rod Collections:
- Carpet Runner must be installed prior to stair rod installation. Zoroufy stair rods are for decorative use only.
- Locate desired position of the brackets by inserting the rod into the brackets and laying one complete set on the stairs. Position both the left and right bracket an equal distance from the side edges of the runner, is the most preferable position.
- Stair rods slide into each bracket approximately 1/2″ (the reason why you order rods 1″ longer than the runner width).
- Finial measurements vary by style and collection (see directions for a specific collection below for finial lengths).
| Click on the collection’s image to get a closer look at the instructions | |
Zoroufy Select
|
Zoroufy Sovereign
|
 |
 |
Zoroufy Dynasty
|
Zoroufy Grand Dynasty
|
 |
 |
Zoroufy Heritage
|
|
 |
|
7) Fix Squeaky Floors
Squeaky floors in your home can get irritating! Installerstore has a simple quick fix for this annoying household sound! Squeeeeek No More squeaky floor repair is a simple to use system that can be used above floors and below floors on the joists.
To read all about the different options to eliminate your squeaky floors, read a blog we published earlier: “Squeaky Floors Got You Down?” or view the awesome video below on the traditional Squeeeeek No More Kit.
8) Replace Furniture Feet
Replacing furniture feet is an inexpensive and easy way to protect your floors from damage. From square legs, to castor wheels and recliner feet, we have furniture feet to fit them all. Can’t find a size you are looking for? Use our convenient large felt pads which measure 4.5″ x 6″, which allows you to cut the felt to the sizes you need!
The furniture feet on our site are conveniently categorized for your easy searching! Simply click the image below or visit THIS LINK to go directly to the furniture feet on our site.

9) Remove Crayon off Walls
Once I left my nephew alone to color quietly in my living room. 5 minutes later it was a little TOO quiet. When I checked on him, he had ever so nicely redecorated with crayon marks on the wall. He meant well, but a panic attack slowly took over. Luckily we had a product that can easily remove pen, ink, marker and graffiti. The Motsenbocker’s Lift Off 3 stain removers can be used on walls, countertops and floors. This miracle stain remover product can even be used on washables/non-washables and carpet/tile. Motsenbocker’s Lift Off 3 not only removes crayon, but also permanent marker, ball point pen ink, and nail polish. Mostenbocker’s have many other quality products such as:
- Lift Off 1 Food, Beverage and Pet Stain Remover
- Lift Off 2 Adhesives, Grease and Oil Stain Remover
- Life Off 3 Pen, Ink, Marker & Graffiti Remover
- Lift Off 4 Spray Paint & Graffiti Remover
- Lift Off 5 Latex Based Paint Remover
Get the best of Motsenbocker’s stain removal products in the convenient kit!
10) Dry Clean Carpets
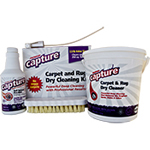
Having your carpets professionally cleaned can get expensive! And renting those carpet cleaning machines from the grocery store can be frustrating! Get professional results with capture carpet dry cleaner. Capture deep cleaning powder is a delicately scented powder which is made up of thousands of tiny, porous sponge like particles. They lock onto dirt, odor and allergen particles that become attached to the fibers on your carpet. Unlike traditional we carpet cleaning systems, this dry carpet cleaning product is great for houses that have residents with allergies, because it absorbs indoor allergens, dander and pollens.
| Installerstore – Dry Carpet Cleaning Products | |
 |
 |
Capture carpet dry cleaner available in starter kit. Purchase the individual items separately including the dry-cleaning powder in 4lb and 8lb containers and 24oz pre-mist spray. |
Host brand dry carpet cleaning products work great as well! Also available in a starter kit. |
Cleaning with Capture is convenient, easy and VERY effective. All you need is a vacuum cleaner! To view full instructions, view our earlier blog dedicated just to this dry carpet cleaning powder: “Capture Dry Carpet Cleaning Products”.
View all the GREAT carpet cleaning products offered by Capture HERE.
While you are making her dreams come true by finishing the “Honey-Do” list, save money in the process! Use the coupon code 4blog11 to save on your order!!


I have read all the information that you provided and I must say it’s awesome. The way you explain everything was so good and the video also very easy to understand. Good job.