Tips on How to Apply Caulking
Removing old mildew infested caulking and replacing with bright new caulking is as easy as 1, 2, 3…..
1) Remove Old Caulk
Place 3M Caulk Softener on existing tub caulk and let stand for 2 hours. This wonder bottle can cover 24 linear feet at an 1/8″ bead, so one bottle should do the trick for your tub surround. Once the caulk softener has been sitting for at least 2 hours, remove old caulk with a putty knife or the caulk removal tool that came in the Professional Caulk Tool Kit (shown below). After removing the existing caulking, make sure to clean the area with rubbing alcohol and NOT water, to ensure that you’ve removed all traces of mildew. Let the area dry. Next, fill the bathtub with water before applying new caulk to ensure the strongest seal around the tub. Optional (and recommended): use Seal Rite Tape to keep application straight and neat.
 |
 |
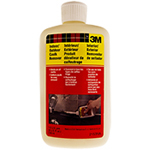
3M Caulk Softener –
|
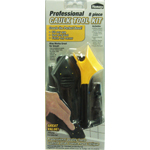
Professional 8 Piece Caulk Kit
|
 |
|
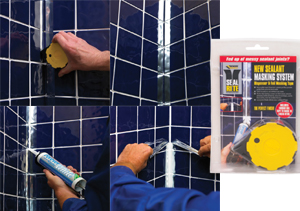
Caulk straight lines with Seal Rite Masking System! |
|
2) Apply New Caulk
First, make sure the area is completely dry to achieve better seal. It is best to apply caulking in temperatures above 40 degrees Fahrenheit. Load caulk tube into a caulk gun and cut tip to 45-degree angle or use tips included with the Professional Caulk Tool Kit. Start first on one of the shorter walls (usually the sides of the tub). When squeezing the trigger, keep moving and always pull the gun in opposite way the gun is pointing (see photo below). Keep constant pressure on trigger and don’t lift gun until you reach the corner.

Photo courtesy of Popular Mechanics Online
Clean tip of caulking tube with paper towel between walls. Ease up on the trigger as you reach the end point (corner). When you are finished with all sides, run the caulk finisher (included in the kit) to smooth down and remove any access caulk. **Make sure to smooth down caulking and clean up any excess caulking within 20 min of applying** Want an easy, clean, stress-free tool to help smooth down caulking? Try the Caulk-EZ Tooling Aid. An aerosol spray that goes on after caulking (before drying) which prevents excess caulk from sticking to your fingers and adjacent surfaces.
3) Let it Dry
Let caulk to dry/set according to the label of whatever caulking you are using, or if you are using the Colorfast Brand Caulking from our site, let stand for 24-48 hours before using the tub/shower. Remove Seal Rite Tape (if applicable) no more than 10 minutes after caulking applied.
Need to find a colored caulk that matches your grout or bathroom decor? Check out our website dedicated JUST to caulking!! Click the photo below or visit THIS link.